How to Polish Your Nails Without Making a Mess
Polishing your nails can be a delightful and relaxing experience. But it can also lead to a messy situation if you’re not careful.
Thankfully, with the right techniques and some mindful preparation, you can achieve that perfect manicure without the causng any mess.
Here’s a comprehensive guide on how to polish your nails effectively, keeping the mess to a minimum.

1. Gather Your Supplies
Before you start, ensure you have everything you need within arm’s reach.
This not only makes the process smoother but also prevents you from needing to get up and potentially spilling products.
Here’s a checklist of items you should gather:
- Nail polish (base coat, color, top coat)
- Nail file
- Nail buffer
- Cotton balls or pads
- Nail polish remover
- Paper towels or a clean cloth
- A small bowl of water (optional)
- A wooden stick or cuticle pusher
- A small fan or hairdryer (optional)
2. Prepare Your Nails
Clean and Shape
Start by cleaning your nails to remove any old polish or oils.
Use nail polish remover and cotton balls for this task.
Once your nails are clean, file and shape them according to your preference—whether that be square, oval, or squoval.
A neat shape not only looks good but also helps with the application of the polish.
Buffering
Buffing your nails is optional, but it can provide a smoother surface for polish application.
Use a nail buffer to gently buff the surface of your nails.
This will enhance the polish’s adherence and give you a more professional finish.
Cuticle Care
To avoid a mess during the painting process, gently push back any cuticles using a wooden stick or cuticle pusher.
Be careful not to push too hard to avoid damage.
You may want to soak your fingers in a bowl of water for a few minutes to soften the cuticles beforehand.
3. Set Up Your Workspace
Creating a dedicated workspace can significantly reduce the chances of making a mess.
Choose a well-lit area, preferably with a flat surface.
Place a clean cloth or paper towels under your hands to catch any drips or spills.
Keep your tools organized, and ensure that you won’t be distracted during the process.
4. Apply Base Coat
Start with a base coat to protect your nails and help the color adhere better.
- Shake the Bottle: Gently shake your base coat to mix it well.
- Brush Application: Dip the brush into the base coat, wipe off any excess on the rim, and apply a thin layer starting from the cuticle and sweeping towards the tip.
- Watch for Overlap: Be mindful not to go too far onto the skin around your nail. This prevents the need for cleanup later.
5. Choosing and Applying Nail Polish
When selecting your nail polish color, consider opting for a brand known for its quality and ease of application, which can greatly reduce messiness.
Application Technique
- Shake and Prep: As with the base coat, shake your polish well.
- Wipe Excess: Dip the brush and wipe excess polish on the bottle’s neck.
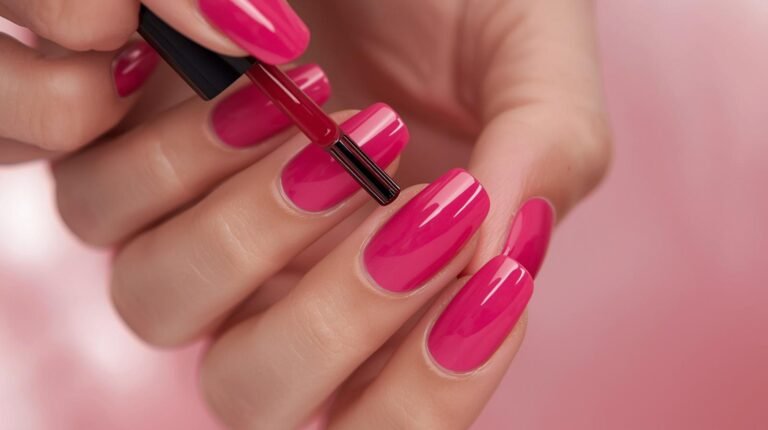
- Starting Point: Begin at the center of your nail, just above the cuticle line.
- Three Strokes Method: Apply the polish in three strokes—two side strokes and one down the center. This technique ensures even coverage and reduces the likelihood of dripping.
Avoiding Overlap
If any polish gets onto your skin, don’t panic. It’s easier to clean up later than to try to control every stroke.
If you do touch your skin, make a mental note so you can touch it up afterward.
6. Top Coat Application
Once your color has dried completely, apply a top coat.
This will not only give your nails a shiny finish but also help them last longer.
- Repeat the Process: Similar to the base and color coats, shake, wipe excess, and apply.
- Seal the Edges: Don’t forget to seal the edges of your nails by running the brush lightly along the tip. This prevents chipping and extends the life of your manicure.
7. Clean Up
After all your coats have dried, take a moment to look for any spills or mistakes.
Use a small brush or a cotton swab with nail polish remover to carefully clean up any excess polish around your nails.
This will give your manicure a polished and neat appearance.
8. Drying Techniques
To speed up the drying process without making a mess, consider the following tips:
- Fan or Hair Dryer: Use a fan or a cool hair dryer to help your nails dry faster. Ensure the settings are on low and cool so you don’t smudge your design.
- Quick Dry Products: Some brands offer quick-dry sprays or drops that can be applied after your top coat. These can accelerate the drying process and are a handy time-saver.
9. Maintain Your Manicure
To keep your nails looking fresh, apply a top coat every few days. This adds shine and helps prevent chips.
Be gentle with your nails and avoid using them as tools to prevent unnecessary wear.
Read more >>> Winter Sparkly Nails: A Must-Try Trend This Holiday Season
Conclusion
Polishing your nails doesn’t have to be a messy process.
With the right preparation, techniques, and tools, you can achieve salon-quality results in the comfort of your own home.
Remember, practice makes perfect, so don’t get discouraged if it doesn’t go perfectly the first time.
Enjoy the process, and take pride in your beautifully polished nails!